Samsa: Baked Meat Buns

Samsa600px
My version of samsa.

Samsa (самса, 烤包子) are baked buns that are eaten all over Central Asia. The filling is usually meat (beef or lamb), onions, and plenty of fat. As you might guess from the name, they are distantly related to Indian samosas. In Xinjiang, they sell these on the street in every city.

selling_samsa
Samsa being sold in Turpan.

Samsa are usually fairly greasy and, like most Central Asian food, best washed down with hot green tea. I often bought samsas to eat on long-distance buses in Xinjiang; one time a man next to me saw my water bottle and cautioned me against drinking it with the samsas. The traditional belief (not only in Xinjiang, but across Eastern Europe and Asia) is that drinking cold things is bad for your digestion, especially after eating greasy food.

IMG_20151225_221138
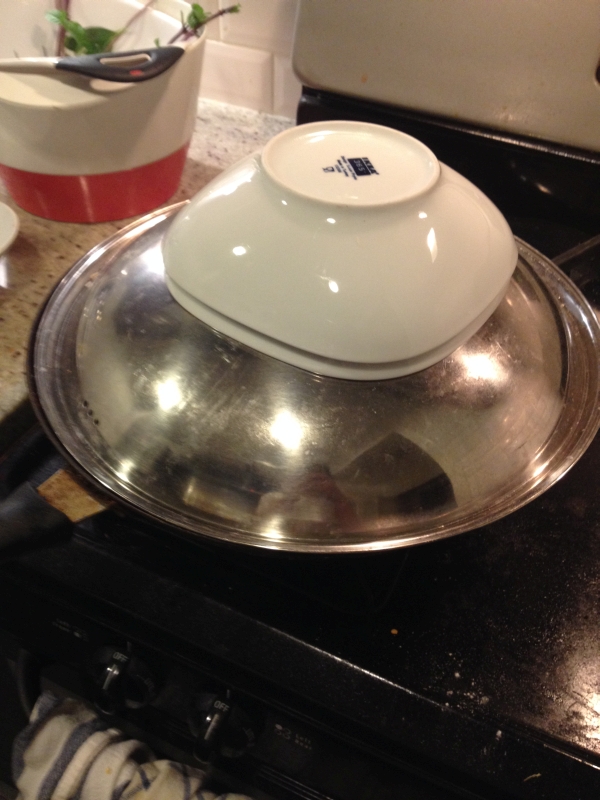
These are traditionally baked in a tandyr oven like nan bread – sticking them straight to the wall and prying them off with tongs. I used a pizza stone and got good results – unlike nan, you can get pretty close to the real thing at home.

The recipe here is for the standard meat samsa. You can also fill them with pumpkin and onion. Although not traditional, I imagine yam or sweet potato would work well too, maybe even taro! You can wrap a chicken drumstick with onion and samsa dough and make amazing baked chicken samsas that turn out wonderfully juicy and tender inside.

Natalia Kim has a nice video demonstrating the process.

chicken_samsa
Chicken drumstick samsa.

Ingredients
Flour
Water
Egg
Salt
Black pepper
Meat (beef or lamb) – use a somewhat fatty cut
Onion
Butter

Directions
1. Make a dough of flour, water, egg, and salt. Knead this until it is fairly firm and let rest for an hour, in the fridge.

2. Take some dough and roll it out until it is very thin and takes up almost all of your rolling space. Lightly brush this with melted butter.
rolldough

3. Roll up the dough sheet into a tube. Coil up the resulting dough twist and keep in the fridge. Do this for all of the dough.
tube dough

4. Chop up the meat into fairly small pieces, making sure to leave the fatty bits in. Mix this with finely diced onion, salt, and black pepper.

5. Portion the dough twist into small pieces. Holding a piece upright (so the spiral faces the ceiling), press down on it with your other hand. What you are doing is squashing the spiral out and creating the layered dough.
dough_pieces

6. Roll this dough out until it is thin. Spoon a good amount of filling in, then fold it up.
fill_piece

If you want to make circular samsa, just bunch up the edges and press it together in the middle (a bit of water may help it stick), but make sure the edges are fairly thin or you will end up with too much dough in the center of your samsa.
wrap_piece

If you want to make triangles, simply fold up two sides then fold the bottom. You can fold into a packet shape (two sides, then two ends) as well.
triangle_samsa

Whatever you do, make sure your samsa are sealed well so the juices don’t leak out during baking.

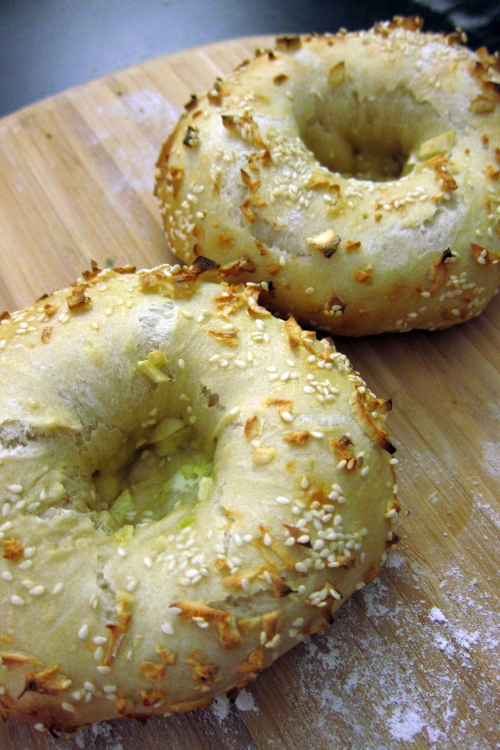
7. Brush the samsas with beaten egg and top with sesame and nigella seeds.
coat_samsas

8. Have the oven preheated to 420 degrees. Place the samsa directly onto the baking stone. Alternately, you can put them on a baking sheet lined with oiled foil.

9. Bake for about 25 minutes at 420 degrees. When they are done, you should see golden brown spots appearing on them. Enjoy!
baking_samsas

Samsa

“Uzbekistan” Salad: Pinnacle of Soviet Fusion Food

SalatUzbekistan
“Uzbekistan” salad. Салат «Узбекистан».

A “salad” in America usually means something thrown together quite quickly – some fresh chopped vegetables, some dressing. If there’s any meat at all, then it’s usually extremely dry chicken breast. “Salad”, in other words, is a health food, a convenience food, something you eat on a diet, something you pick at as a side dish, but generally not something you actually want to eat.

Not so in Russia and the former Soviet Union. Salads are usually quite extravagant, complicated dishes served at parties or as a first course. And more often than not, they are anything but healthy – covered in mayonnaise and filled with all sorts of cold cuts. In other words, something you might actually look forward to eating!

american vs russian salads
American salads (top) vs. Russian salads (bottom)

“Uzbekistan” salad, despite the name, isn’t part of traditional Uzbek cuisine. Supposedly, it was invented in the 1950s in Moscow when Uzbek chefs tried to introduce Russians to their national cuisine for the first time. It combines Central Asian green radish with the Russian love of mayonnaise – almost like an Uzbek version of the famous “Olivier” salad. It does look pretty “retro” – it reminds me of something you’d see in 1970s US cookbooks – but trust me, it’s delicious. The green radish is a refreshing complement to the fried onion, mayo, and oven-baked steak.

greenRadishAtStore
Green radishes. Asian groceries should stock them. Daikon tastes similar, but lacks the nice color.

This recipe is adopted from Stalic Khankishiev’s book “Базар, казан и дастархан” as well as Hakim Ganiev’s book “Восточный пир”. Stalic has a video recipe for this dish, but he does it slightly differently than in his book – using yogurt instead of mayonnaise for the dressing.

Ingredients
Green radish – the color is what makes this dish special – but if you can’t find them, substitute with daikon
Mayonnaise – I like Japanese “Kewpie” mayonnaise, but any will do
Beef – use a steak cut
Onion
Garlic
Salt
Pepper

Directions

1. Skin the green radish and slice it into sticks. Let the radish sticks sit in a bowl of salted cold water for 30 minutes.

GreenRadish
2. Skin and chop a few garlic cloves lengthwise.
3. Rub the beef with salt and pepper. Using a knife, make little holes in the beef and stick the garlic pieces inside. Do this all over the beef on both sides. Ainsley Harriott demonstrates the technique quite enthusiastically in this video.
4. Wrap the beef in foil (use at least 2 layers) – make sure it’s tightly sealed, then put it on a baking pan in the oven for 30 minutes at 400F.
BakedMeat

5. Skin an onion, and chop it into rings. Cover the onion rings in flour and sift them a bit to get rid of the excess flour.
6. Deep fry the onion rings until golden brown. Let them drain on a paper towel.
7. When the beef is done (it would taste delicious as-is for a simple meat dish), let it cool down, then slice it into long, thin strips.
8. Layer the bottom of the serving dish with the radish slices, then the meat slices, then cover this with a generous amount of mayonnaise. Put the fried onion rings on top. Imagine you are in one of the finest Uzbek restaurants of Soviet-era Moscow. Priyatnovo appetita!
SalatUzbekistan2

If you don’t want to go all that trouble, a simple salad of green radish, salt, pepper, and oil is a refreshing accompaniment to heavy food and easy to make. It’s no “Uzbekistan” salad, but it’s a nice way to eat green radish.
SimpleRadishSalad

Manti: Central Asian Steamed Dumplings

manti

Manti in most Turkic languages refers to dumplings, but the basic concept of dough stuffed with meat has spread from Central Asia to the cultures surrounding it: Afghan mantu, Nepalese momo, Russian pelmeni, Georgian khinkali, Chinese mantou, and Korean mandu. Dumplings, in various forms, are eaten across a huge expanse of the Eurasian continent stretching from Eastern Europe in the west to the Korean peninsula in the east. Some historians even think Turkic horsemen in ancient times carried frozen dumplings as a convenience food on expeditions, helping to spread these all over the world.

WorldOfManti
Manti and its relatives around the world. Clockwise from top left: Central Asian manti, Nepalese momo, Georgian khinkali, Korean mandu, Chinese jiaozi, Afghan mantu. Source: Wikimedia

When we look at Central Asian cuisine, we find dishes that could be ancestors to manti: after all, beshbarmak is almost like an open faced dumpling, and goosh nan is basically a dumpling in pie form. And then there are more obvious relatives, like chuchvara, the miniature dumplings Uyghurs eat in soup.

The manti recipe presented here is the type you can find all over Central Asia – steamed dough wrappers filled with chopped meat, folded, and steamed. The miniature “manti” eaten in Turkey are more similar to chuchvara, which I’ll cover in another post. Making manti is rather simple, and as this video demonstrates, you can fold them all sorts of different ways. You can buy dumpling wrappers from Asian groceries to save time.

Ingredients
Dough:
Flour
Salt
Egg
Round dumpling wrappers (optional if you don’t want to make dough)

Filling:
Beef or Lamb
Onion
Butter (maybe 2 TBsp per 1lb of meat, vary to your preference)
Black pepper
Cumin powder and coriander powder (optional)

Sauce:
Sour cream
Kefir or yogurt
Dill
Garlic
Salt and pepper to taste

Directions
1. Make a dough out of flour, water, salt, and egg. Knead this for 10 minutes and rest for an hour.
2. Finely chop up the meat into small pieces. It’s important to chop the meat yourself rather than using ground meat – the dumplings will be much tastier and juicier with whole meat pieces rather than ground meat. Finely chop the onions, making sure there is a ~1:1 ratio of meat and onion volume. Finely chop the butter into small pieces, then mix everything together. Add salt, black pepper, cumin and coriander powder to taste.
3. Shape the dough into a cylinder, then cut it into discs and roll each disc out to make a wrapper. Alternately, just use round dumpling wrappers from the grocery – the taste is not too different, although you need to use a bit of water around the edges to get them to fold properly.
4. Fold the manti – there are many folding methods you can try, though in the end it all tastes about the same – simply pressing the edges together is fine.
dumplings1
5. Make the sauce: finely mince or press the garlic, finely chop the dill, then mix with sour cream and yogurt, and add salt & pepper to taste. The exact proportions are up to your personal preference (some like more or less garlic, dill, sour cream, more or less liquid, etc)
6. Steam the manti for 40 minutes. Serve with the sauce. Enjoy!
steamer2

Basma: Uzbek Slow-cooked Lamb Stew

dimlama5
My version of basma, with nan bread.

Basma is an incredibly simple dish to prepare with amazing results: tender, juicy, lamb meat that practically melts in your mouth, in a rich vegetable broth with plenty of soft carrots and potatoes. It’s crowned with a few heads of garlic cooked whole: the garlic cloves fall right out of the skin and are so soft they’re almost like a puree. And yet this dish requires nothing more than 1) cutting vegetables and 2) time. To be sure, it involves a lot of vegetable cutting. And it takes almost 2 hours to cook after the prep is done. But the result is well worth it.

Newnan5
Nan bread is great for soaking up the dimlama broth. Recipe here.

This dish comes from Uzbekistan and goes by a few different names: basma and dimlama/dumlama. According to Stalic, basma refers to this version, where everything is put into a cold kazan and then steamed, while dimlama refers to a similar dish where everything is fried before steaming.

This recipe comes from Stalic Khankishiev with some minor alterations (video here). Abdulaziz Salavat has a video recipe for basma (he calls it dimlama) as well.

Ingredients:
Lamb – I used 2 lbs of lamb shoulder chops in the pictures. The cooking time will depend on how tender your meat is.
Onions – 2
Potatoes – 4-5
Carrots – 3-4
Tomatoes – 3-4
Bell peppers – 2
Cabbage – 1 head of cabbage
Garlic – 2 heads of garlic
Salt
Cumin seeds
White pepper
Paprika
Basil or cilantro or other fresh green herbs
Chili pepper (fresh) – 1 (optional)
Dried chili peppers (optional)
Eggplant (entirely optional, I didn’t think it added anything)

Directions
1. Chop all the vegetables: cut the potatoes into halves or quarters; slice the onions thinly; cut the carrots into discs; cut the bell pepper into slices; cut the tomato into quarters; peel off several whole leaves from the cabbage and set aside, then chop the cabbage into thick slices; chop the eggplant. Cut the lamb into medium/large pieces, making sure to leave some fat on the meat. Roughly grind the cumin seeds.
ingredients

2. Through the entire layering process, the heat is turned off. Pour some oil to cover the bottom of the wok, then place the meat in. Make sure the meat is sitting in oil and not directly on the metal surface. Put salt, cumin seed, white pepper, and paprika on the meat.
meat

3. Scatter the onions all over the top of the meat to make another layer. Salt the onions.
onions

4. Put the tomato pieces on top of the onions.
tomatoes

5. Put the carrot slices on top of the tomatoes, then the bell pepper slices. Put the whole fresh chili pepper and some dried chili peppers. Place the heads of garlic, digging them in a bit so they don’t fall off the pile.
carrots

6. Place the potato pieces on top.
potatoes

7. Place the chopped cabbage pieces on top of the potatoes, and repeat the seasoning from step 2: salt, cumin seeds, white pepper, and paprika.
cabbage

8. Put the eggplant and basil leaves at the very top.
greens

9. Using the whole cabbage leaves you set aside, make a dome over everything. This will help keep the steam in.
dome

10. Cover with a lid. If it doesn’t quite fit, weigh the lid down to make sure it is sealed tight. Now the magic begins! Turn the heat up to medium and let it cook for 15 minutes. Then turn the heat to low and let it simmer for at least 1 hour and 30 minutes, longer if you are using tougher meat. Be careful not to turn the heat so low that it stops simmering. When you put your ear to the pot, you should hear a steady bubbling.
cover

After the long wait, when we open the dome and break through the outer layers, we find the inside has turned into a vegetable broth! Plate everything and serve with some bread and hot green tea. Osh bolsin!
finish

dimalama1

Goosh Nan: Uyghur Meat Pie

goshnan
My version of Uyghur meat pie or goosh nan. Deep fried version.
meat pie slice 2
Steamed version of goosh nan.

Goosh nan (گۆشنان, gösh nan, “meat bread”) is the Uyghur version of a dish that is popular all over Central Asia and the Turkic world. It’s a round, flat pie stuffed with mincemeat, fried, and sometimes additionally steamed. It was one of my favorite dishes in Xinjiang, and makes a great appetizer or light meal, with plenty of hot green tea to wash it down.

meat nan in urumqi
Goosh nan in an Urumqi restaurant.

Goosh nan’s closest relative is the Tatar cheburek (or çiğ börek in Turkish), which is a half-moon shaped dough stuffed with meat and deep-fried. The concept of meat wrapped in dough is a key feature of Central Asian cuisine: manti, börek, chuchvara, goosh nan, and cheburek are all variants of the same idea.

gosh_nan
Gosh nan in an Uyghur restaurant in Bishkek, Kyrgyzstan.

Goosh nan is a simple dish to prepare: roll out two pieces of dough to paper thin circles, top one with mincemeat, cover it with the other dough, and fry. Sometimes it is also steamed after frying, and sometimes it is more bready and baked, like in the picture below:

meat pie in kashgar
Goosh nan in a Kashgar restaurant.

This recipe is from Abdulaziz Salavat (in Russian). Here is an Uyghur video as well. I like the deep fried version the best, but try the steamed version too; it gives it a unique texture and flavor.

Ingredients:
Finely minced beef or lamb. It’s better when you mince the meat by hand, but ground meat will do.
Onion
Salt
Black pepper
Flour
Water
Egg

Directions:
For the filling
1. Finely dice the onion and mix it into the ground meat with salt and black pepper. This is the same basic filling as in manti, cheburek and chuchvara. 
farsh

For the dough
1. Make a fairly firm dough out of flour, water, egg, and salt. Knead for 10 minutes and let it rest for 30min-1hr (it will be easier to roll out if you rest it).

2. Take two pieces of dough about the size of your palm. Roll each of these out to a wide, paper-thin sheet.
rolled dough

3. On one of the dough sheets, put your meat filling in a circle a bit smaller than the pan you will fry it in. Make the filling smooth and even.
dough with filling

4. Cover it with the other dough sheet, pressing down firmly all around the meat so the dough sticks together.
layer dough

5. Use a knife to cut out a circle, leaving room around the edges.
cut dough

6. Use your hands to make little folds all around the edges of the dough and press firmly so the dough pieces do not come apart.
folded edges

7. Deep fry the pie until golden brown. If you want to make the steamed version, you don’t have to deep fry it (steaming will make it un-crispy again anyway) but still fry both sides until golden brown. When it’s done, drain the pie on a thick pile of paper towels and dab oil off the top.
frying pie
draining pie

By the way, if you want to make cheburek, just do all the above steps, except make only one dough sheet, put meat on one half side, then fold it over.
cheburek2
8. If you want the steamed version, put the pie in a steamer, cover, and steam for 25 minutes.
steam pie 2

Ishtiha bolsun!

goshnan2
Deep fried version

meat pie with salad
Steamed version

Khachapuri: Georgian Cheese Bread

Khachapuri2_2
My version of adjaruli khachapuri.
khachapuri
My version of megruli khachapuri.

Khachapuri is probably the most famous Georgian dish, and for good reason. It is incredibly simple to make and very tasty. If you like cheese and bread, you will love this dish.

There are several different varieties of khachapuri but they are all variations on the same idea: cheese stuffed with bread. Adjaruli is a boat-shaped bread filled with cheese and topped with egg and butter, mixed before serving. Megruli is a round-shaped bread filled with cheese and/or egg, sometimes with cheese on top. If you have enough dough and cheese, you can make both types at the same time.

In Georgia, khachapuri is filled with Georgian cheese, typically suluguni. I use a mix of mozzarella and feta or goat cheese. The idea is a cheese with the consistency and melt of mozzarella but with saltiness and tang. If using goat cheese, I would not use the rind.

This recipe is adopted from BigGeorgeHighlander and also this New York Times recipe for khachapuri (where I got the cheese mix idea).

Ingredients
Flour
Yeast
Salt
Cheese (equal parts mozzarella and feta or goat cheese)
Egg
Butter (optional, for adjaruli)

Directions
1. Make a dough out of flour, warm water, yeast, and salt. Knead this for ten minutes, then rest covered in a warm place for 1 hour.
raised dough

2. Mix your cheeses together with an egg white and a bit of salt depending on how salty your cheeses are. Mix well until you have produced a cheese mix of solid consistency.

cheese1cheese2

For Adjaruli:
3. When your dough has finished resting, take a piece and roll it out into an oblong shape. Not too thick or thin, maybe 1/2 cm thick.
roll dough

4. Roll the long edges of the dough inwards and press the ends together to make the boat shape. Experiment with shapes; some people make a more fat and round shape, some twist the ends together, etc.
shape dough

5. Fill the dough boat with cheese. You can brush the dough with egg yolk if you want the resulting bread to have an extra golden crust.
fill cheese

6. Preheat the oven to 450F. Place the filled dough onto a pan lined with parchment paper or oiled foil. (It may be easier to fill the dough directly on the pan so you don’t need to move it). Bake for 10-15 minutes or until golden brown.

7. Take the bread out, make a small indentation in the middle of the cheese, and crack an egg onto it. Return the pan to the oven and let it bake for a few minutes longer until the egg white has set.
put_egg

8. Cut two slices of butter and stick into the cheese on each side of the egg. Mix everything together well before eating.
khachapuri_mix

For Megruli:
3. When your dough has finished resting, take a piece and roll it out into a round shape. Not too thick or thin, maybe 1/2 cm thick. Place a ball of cheese on top. You can mix the cheese together with egg yolk, but make sure it doesn’t get too runny.
make_round1

4. Fold up the edges of your dough around the ball of cheese.
make_round2

5. Press down to flatten the ball into a round disc of dough. Flip the dough back and forth a couple times to widen out the disc.
make_round3

6. (Optional) Brush the top of the bread with egg yolk and sprinkle some extra cheese on top.
make_round4

7. Rip a little hole in the top of the bread. This is an important step that will prevent the bread from rising up and bursting inside the oven.
make_round5

8. Preheat the oven to 450F. Place the filled dough onto a pan lined with parchment paper or oiled foil. Bake for 10-15 minutes until golden brown.

Enjoy…
khachapuri with chakhokhbili


Khachapuri2

Beshbarmak – Central Asian Nomad “Lasagna”

Beshbarmak_1
My version of beshbarmak.

Beshbarmak looks like something a nomadic horseman would eat: wide pasta topped with big hunks of meat and onion. It doesn’t look particularly appetizing. But believe me when I say it is something special.

I added bell pepper to my version to give it some color, but it is entirely superfluous. The magic is in the rich, savory meat broth and the tender pasta sheets. My wife, upon seeing it for the first time, called it an “open-faced lasagna.”

Beshbarmak as served in Kazakhstan. Photo from Wikimedia Commons.

Beshbarmak literally means “five fingers” due to the way it used to be eaten. It originates from the nomadic peoples of Central Asia, and nowadays this type of dish is enjoyed all across the region: as beshbarmak by the Kazakhs, Kygryz, Tatars, and Bashkirs, as turama or dograma in Karakalpakstan and Turkmenistan, and naryn by the Uyghurs. Truly a pan-Central Asian dish!

Traditionally, beshbarmak is cooked with all sorts of different lamb and horse meat cuts, as well as kazy (horse meat sausage). I have a hard enough time finding lamb meat here in NYC, so I just used lamb shoulder chops. It would work well with beef, too.

My version is a little different from the traditional dish. Traditionally, the meat is boiled (I sautee it then simmer) and there are no vegetables other than onion. I was inspired by this Uyghur video which is actually for a different dish entirely. Stalic has a video for beshbarmak, as does Abdulaziz Salavat (both videos in Russian). The Russian Wikipedia article for Beshbarmak has everything you would want to know about its etymology and its different national variants.

Ingredients:
Flour
Egg
Salt
Oil
Lamb meat
Onion
Cumin seed
Bullion cubes/powder
White or black pepper
Bell pepper (entirely optional)

Directions:
Noodle making
1. Make a dough out of flour, egg, salt, water, and a bit of oil. Knead for 10 minutes and set aside, covered. Let it rest for at least half an hour.

2. Roll the dough into a cylinder and use a knife to cut off a small piece. Lightly oil the piece.
CutDough

3. Use a rolling pin to flatten out the piece into a big, thin, pasta sheet. Continue until you’ve used all the dough. Make sure to space out the pieces so they don’t stick together.
RollDoughPieces

4. Bring some water to a rolling boil, lightly salt, and put in the beshbarmak pieces one by one. After the water has returned to a rolling boil, let it cook for another 1-2 minutes. Be careful not to overcook the noodles – you want them al dente.
CookNoodles

5. Drain the noodles and rinse them with cold water. Layer the noodles in a plate.
PlateNoodles

Making the topping
1. Sautee the lamb meat in oil over medium-high heat until browned.

CookMeat
2. Add in the onions and cook until soft and translucent. Add salt, cumin seeds, and white or black pepper. Mix well.

CookOnion
3. Add bouillon/water until the contents are barely covered.
4. When it starts to boil, turn the heat to low and cover. Cook for at least 30 minutes.
CookBroth

5. Open the lid and add in the bell pepper. Cook this briefly over medium heat.

AddBellpepper
6. Pour some hot broth over the noodles to warm them up. Put the topping on the noodles. Ash bolsun!

Beshbarmak

Kutab: Azerbaijani “quesadilla”

Kutab

Kutab (qutab, кутаб) comes from Azerbaijan: a Turkic country on the western shore of the Caspian Sea, formerly part of the Soviet Union. Although they don’t share a border, Azerbaijanis can understand Turkish and vice versa to some extent.

Kutab is a wonderfully simple dish that makes a great brunch: thin dough stuffed with filling and grilled on a saj (or in my case, a frying pan). The filling can be vegetables, cheese, and/or meat; I made mine with cheese and realized how similar it was (at least in concept) to a quesadilla.

This recipe is from Abdulaziz Salavat, video here ( in Russian ).

Ingredients:
Flour
Salt
Oil
Cheese (your preference; I used a mix of mozzarella and feta)
Greens (up to you; I used spring onions and cilantro; dill, basil, or parsley would be nice too)

Directions:
1. Make your filling: mix the cheese, greens, and some oil together in a bowl.

MixCheese

2. Make a dough of flour, water, salt, and oil. It will be easier to roll out the dough if you let it rest for a bit (30min-1hr, covered so it doesn’t dry out). No need if you’re in a hurry, though.

DoughPieces

3. Break the dough into small pieces as above. Lightly oil a piece, then roll it as flat and wide as you can. It should be almost paper-thin and slightly translucent when it is thin enough.

RollDough

4. Spread the filling on one half.

FillDough

5. Fold the dough over and press hard around the filling so the dough seals.

FoldDough

6. Cut a nice round shape out of the dough.

CutDough

7. In a frying pan or on a griddle, grill the kutab on medium heat until the bottom has golden brown spots (should take 3-5 minutes). Flip the kutab over. The other side will get done much more quickly, so be attentive – after 1-2 minutes it should be nice and golden brown. Eat by itself, or with melted butter, sour cream, or yogurt. Enjoy!

Grilling

Kutab2

Uyghur “bagels” (Girde nan)

Bagels

We covered the iconic round Uyghur nan bread in another post. Another one of my favorite Uyghur breads is “girde nan”, which resembles a bagel, or more precisely, a bialy. It’s shaped like a bagel but the hole doesn’t go all the way through. They cook it in tandoor ovens just like nan, slapping it onto the walls and prying it off with tongs when done.

BagelsPile600px

BakingBagel600px

Making these yourself is actually really simple, and way easier than the big disc-shaped bread because you want it to be thick. The instructions are the same as for nan, but shaping them is much easier. You can put your favorite bagel toppings on them too; I like putting garlic even though that isn’t really common in Xinjiang.

Directions
1. In a large bowl, make a mountain of flour with a hole in the middle. Pour warm water into the middle, add 1/3-1/2 packet of dry yeast, salt, and a bit of sugar. Mix well and let stand for a few minutes. When it has gotten frothy, add the egg in. Then mix everything well, adding water as needed.
FlourYeast

2. When you have a somewhat firm mixture, flour a surface and knead the dough for 10 minutes.
kneading

3. Oil a bowl and put the kneaded dough ball in, cover with a cloth and let rest for 1 hour in a warm place. Preheat the oven to 500 F at this stage.

4. When the dough has finished resting, punch it down and knead it a bit more.
RisenDough

5. Take a piece of dough and roll it into a ball; flatten it a bit with a rolling pin and use your thumbs in the center to make a deep indentation. Use a fork and poke holes all around the edge of this indent and in the center so it doesn’t rise.

6. Coat the outside with egg or oil, and add your favorite toppings: sesame, nigella seeds, poppy, garlic, onion, etc. Bake on a pizza stone for ~10 minutes or until golden brown. Enjoy!

girde_nan

Uyghur laghman noodles with omelette

Lagman2

EatingLagman
Every restaurant has its own variety of laghman. In Uyghur restaurants, it usually means a dish of noodles topped with lamb and vegetables in a tomato-based sauce. In Uzbek or more Russianized restaurants, it’s often more like a noodle soup. In essence, laghman is just wheat noodles with sauce. Even Italian spaghetti bolognese could be considered a distant European cousin of laghman.

I really like the addition of sliced omelette. The recipe is adopted from Abdulaziz Salavat who calls it “suiru lagman”(video in Russian).

Ingredients
Flour, salt, and egg for laghman dough – or buy premade flour noodles
Lamb or beef meat – diced in small pieces
Bell pepper – diced
Tomato paste, 1-2 tablespoons
Onion – diced
Garlic – diced
Salt
Red pepper powder
White pepper powder
Paprika
Chinese black vinegar (e.g. Chinkiang vinegar)
Soy sauce
Cilantro – chopped
3-4 eggs (for omelette), beaten

Directions
1. Make the laghman noodles following the directions in the previous post. Boil in salted water until done, then rinse and plate.
RinseNoodle

2. Prepare the omelette in a separate pan: fry the beaten eggs in oil until solid, turn and fry a bit more on other side. Cut the omelette into slices.
CutOmelette

3. Over high heat, stir-fry the lamb pieces in a heated wok until lightly browned.

4. Add in the onion and cook until soft and translucent.

5. Add the garlic and a bit of cilantro, cook this until the garlic is fragrant.
add garlic

6. Add in the tomato paste, cooking it for a bit first, and mix well.

7. Add some water or bouillon to make a sauce. Turn the heat down to medium. Add in the bell peppers and cook for a bit.
Cooking

8. Add salt, white pepper, red pepper, and paprika. Let everything cook and the sauce reduce for a bit.

9. Add a dash of soy sauce and black vinegar. Add in the cilantro.

10. Finished! Top the noodles with sauce and omelette slices.
LagmanTop